


Week 7- Home Improvement Store Materials
For weeks 1-6 Click here
For the Results of last week Click here
Let's just cut right to the chase shall we?
Ladies.... strut your stuff!
*side note- Caroline at The Feminist Housewife had to drop out due to some unforeseen personal events. Thanks for participating on SYTYCD! Your projects were amazing and we sure wish you the very best! :)


#1-Flea Market Trixie- Cavity Cap Mirror
loved this week's challenge because I'm one of those people who love to roam home improvement stores looking for interesting objects.
When I come across something I've never seen before, I think to myself, what could I make out of this?
My mind usually races with many ideas, but I also want to stay true to my decorating style as well.
So, as I was wandering endlessly through Lowe's, I came across 6 inch square galvanized pieces in the cement block section, also known as cavity caps. Cavity caps lock firmly between concrete block cells to stop mortar infiltration. Who knew? But how unique?

When I picked them up, I knew I could think of something to make with them. And the price confirmed it, at just .18 cents each, how could you beat that?
I'm all about making things on the cheap. I believe that anyone can make something beautiful if you spend a ton of money, but making something inexpensively can be a challenge in and of itself. I guess I thrive on that kind of a challenge. Call me cheap or thrifty, but it's all about saving money and making something pretty at the same time.
I wanted to mimic the look of old tin ceiling tile and I thought a mirror would fit that style perfectly.

I painted, distressed and aged each cavity cap. I built a wood frame using scrap MDF and used some trim for the inside and outside edge.The entire project used a total of 12 cavity caps making the frame about 25.5 inches square. I love the look of it so much, I plan on making another one for my porch.
(FYI- you can find the cavity caps and Lowe's and Home Depot stores).

Please visit me Here for more ideas.
#2- All Things Thrifty- MDF Wall Art
Building materials are my friend, and I have to admit I am pretty darn lucky in this department. I have the handiest husband around. Whenever I have an idea, he is my "go to" guy for sure. He is a good sport, and honestly, this project was designed by Brooke, but it was executed by Dan. What a hunk, huh!
MDF is a common building material that is perfect for projects like this one, and the greatest thing about it is that an entire 4 foot by 8 foot sheet only costs $25.00. We wanted the MDF to stick off the wall, and that is why we bought it 3/4 inch thick.

The design I chose was from a pillow (see image below). I used a projector to trace the design onto the MDF boards. After I traced the design, the hubsters cut it out with a jigsaw. I told him I would help, but I think he was afraid I'd screw it up. :) So, he spent 5 1/2 hours cutting out the design for me. After that, I primed and painted them and then upholstered the back with black felt

Although the project was time consuming, it is a very simple project that anyone can do if they have the patience and tools needed.


Sometimes a huge wall in a room can be a challenge, but a project like this is perfect and CHEAP to take up the entire wall.


#3- Miss Mustard Seed- Exposed Wall with Hardboard
I can't really say how this project came about. Last week, I had no clue what I was going to do. I walked through the aisles of Lowes, talked to people in every department and asked questions like, "Do you think I can pull this fence apart and use the pieces for something else?", "Do you sell this piece by itself?" and, my favorite, "I know this sounds really crazy, but could I use that like this?" My mother-in-law and I hummed over roofing supplies, turned plungers upside-down to see their potential, and zigzagged from one side of the store to the other in search of the perfect materials for the perfect project.

I've had a thought in my head about creating an exposed board wall for a while and my guest room needed a makeover, so this is the idea I kept coming back to. I live in an older home, but my walls are plaster board and I don't have boards to expose, so the only way to get that look was to create it. This challenge was the perfect opportunity to make my idea a reality.

I looked at materials all over Lowes and the best and cheapest solution was hardboard. I purchased three 4x8 sheets, but only used two. At $11.00/sheet, this project was $22.00 for the hardboard, $5.00 for a gallon of Oops "Crisp Linen" paint from Sherwin Williams, and $19.00 for a gallon of tinted primer.

My husband cut the hardboard in 4" wide strips using his table saw and I attached them to the wall using the beastly DeWalt finishing nailer. (I'm pretty proud of myself for that.) I also used a chop saw and jig saw to cut pieces to the proper length and around the angled ceiling. This project then snowballed into painting and redecorating the entire room.

I am absolutely in love with the finished product and how it totally transformed the room. This dark and awkward space is now bright and filled with character. It's now my favorite room in the house.

Visit my blog for more before and after pictures, details on the process and some extra eye candy.

#4- Funky Junk Interiors- Tongue and Groove Board Gate Screen
I LOVE old gates.

I've had these privacy screens as my main window treatment on my large picture window forever. However I always had visions of making them look like old gates. So You Think You Can Decorate, Home Improvement Store Materials, to the rescue!

Pine tongue and groove boards were air nailed direct onto the existing screen frames. They were then shaped on top, fancy trim added, then painted and glazed for the full effect. And here is the end result!
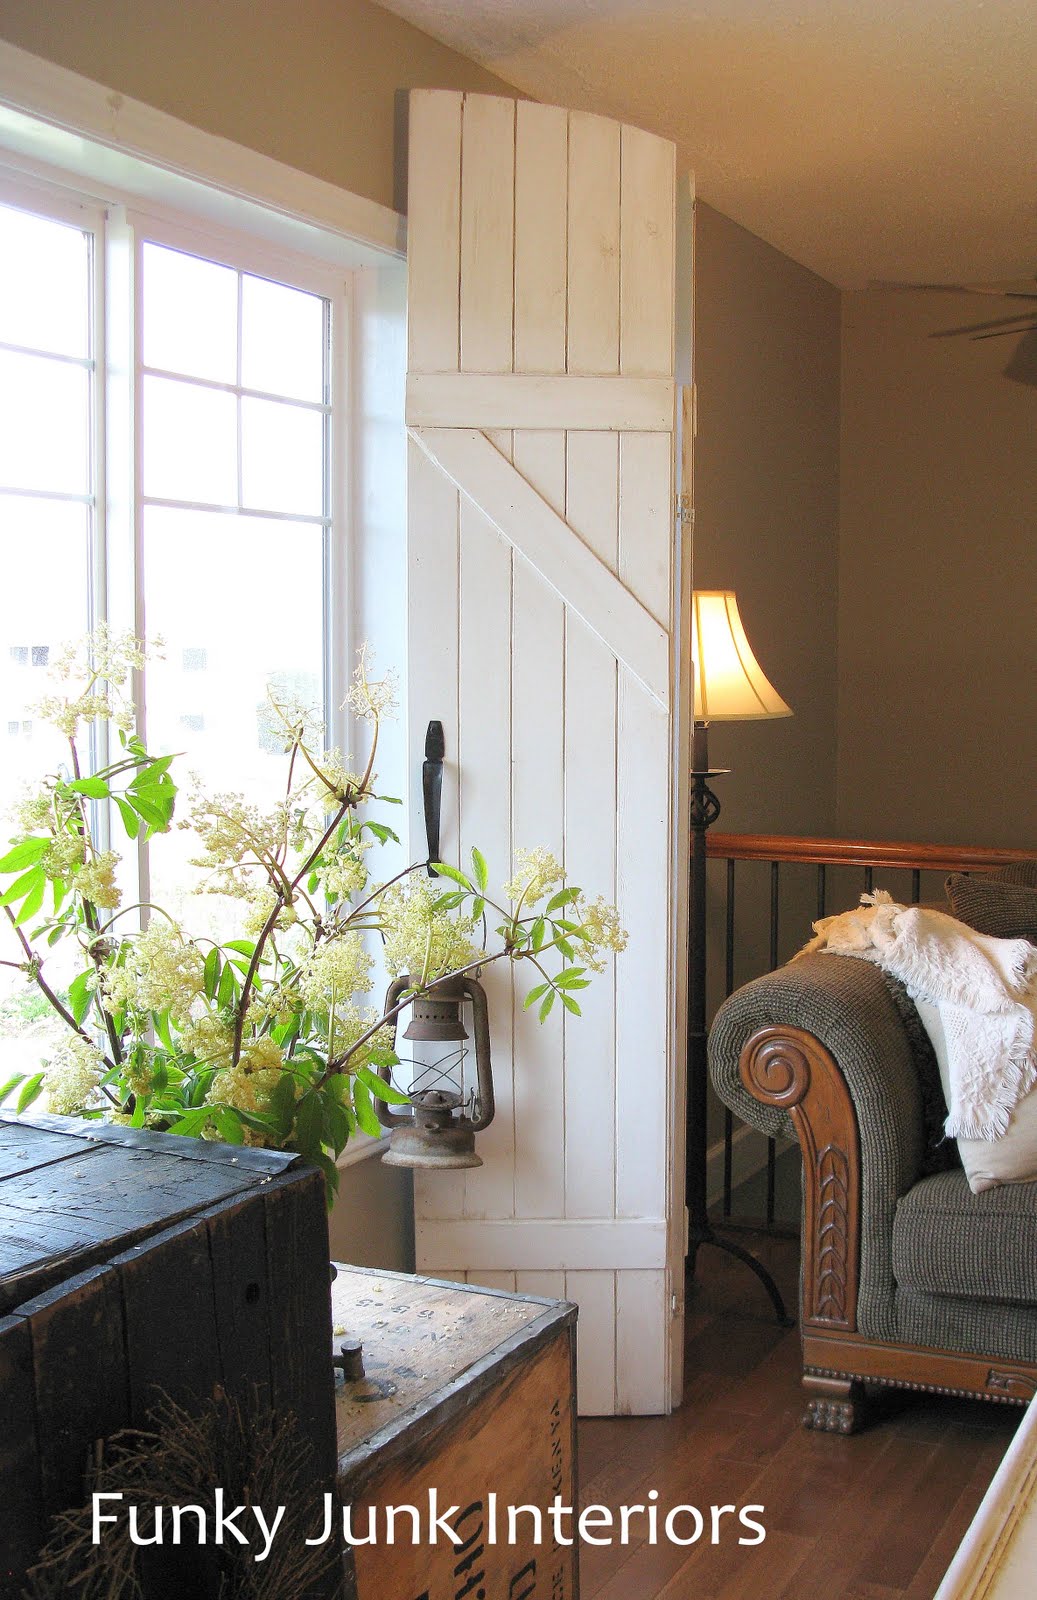
The perfect cottage touch for windows. :)
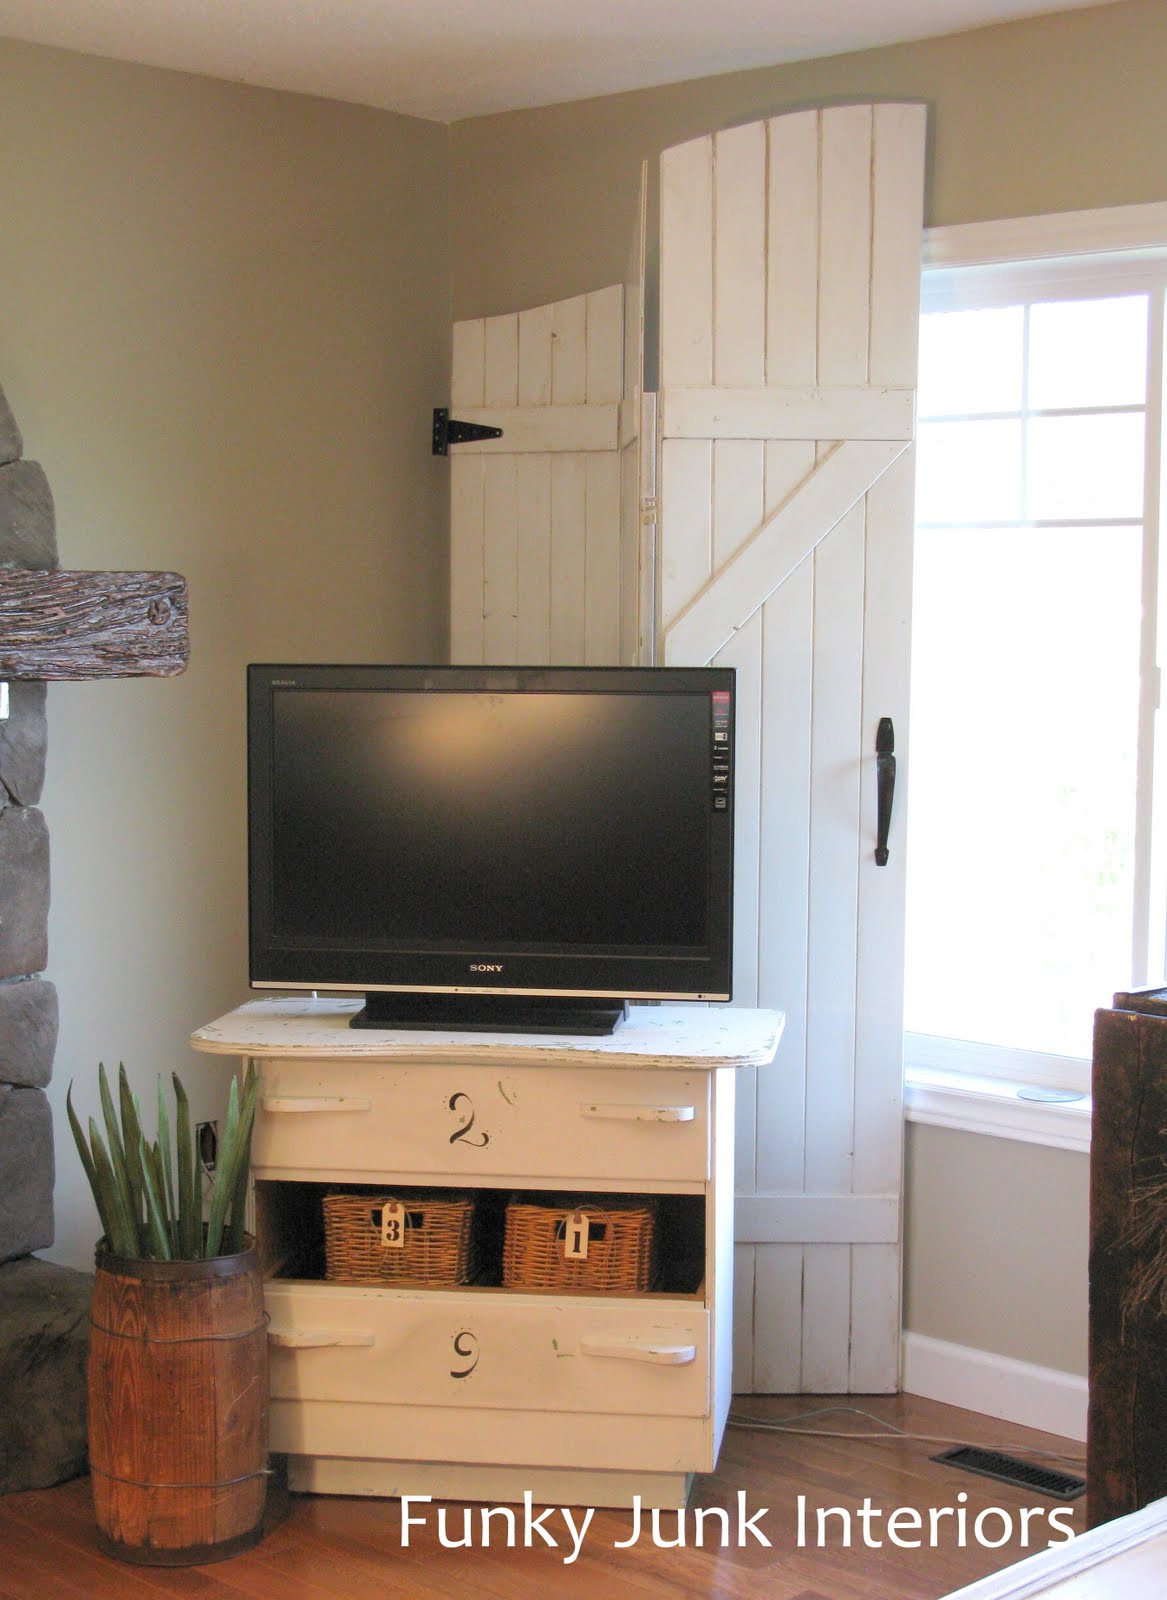

The gate screens resemble one large entry gate, opening from the middle. Real gate hardware was added for an authentic touch. The gates are large, however don't overpower the area. The white actually lightens and brightens the room, with the curve on top minimizing the boxiness of the window. Why not curtains instead? The gate screens are the perfect carefree window treatment for a pet environment. I am thrilled with the final outcome!
For a complete tutorial, please visit my blog, Funky Junk Interiors.

Can I just say that this week is my new favorite week?!!! I thought that the "White" themed week couldn't possibly be topped..... Boy was I wrong!!
Good luck only picking 1!!!


I have been voting since the very beginnning. I thought last weeks was tought to pick, but this is even tougher.
ReplyDeleteSorry to hear about Caroline. I wish her well. Good luck to the rest of the contestants. I have enjoyed all the creativity that was shown and shared. Thank you for everything ladies.
I don't think I can decide--oh so hard and all so wonderful!! Thanks ladies for the inspiration you give and the effort you put forth each week.
ReplyDeleteWow! I love all of these!
ReplyDeleteWOW, too hard to pick just one, these are all great!
ReplyDeleteWow. This was definitely the best week. SOOO hard to choose who to vote for!
ReplyDeleteOH my gosh...did they out do themselves here??? These gals are totally amazing! I don't know how I'll vote. I'm in love with every single one!
ReplyDelete~Kolein
Wow - I love all four! This was my favorite week also!
ReplyDeleteThat was a really hard choice, hardest yet for me. Loved them all.
ReplyDeleteWow, the competition is getting so stiff. These are all really great projects! Can't you figure out a way to let everybody win?lol
ReplyDeleteI love this week also! I CANNOT, for the life of me, chose one....I love 'em all!!!
ReplyDeleteNice work, everyone! Whew...so much talent!
ReplyDelete: )
Julie M.
Boy! It is getting harder and harder to pick!! I too think they are all amazing!!
ReplyDeleteOff to vote now
Hugs
SueAnn
oh wow! These are all great this week!
ReplyDeleteWow - this week is tough! Everyone really brought out the big guns...how will I choose?
ReplyDeleteAll that I can say is Wow, Wow, Wow!!! It just keeps getting better. Once again I had such a hard time picking my favorite. Thanks so much for bringing all of these talented ladies together to share with me.
ReplyDeleteSmiles,
Carol
Wow, as I scrolled down and read each one, I thought to myself, "I'm going to vote for that one." Then, the next one would be really good, then the next one...I don't know which is my favorite. And, only one to vote for? Oh my. They're all great!
ReplyDeleteThese are great - I especially love the mirror and the gate shutters - great work ladies
ReplyDeleteThe "vote" box isn't up on my screen. Technical difficulty or has it moved somewhere else in the post?
ReplyDeleteI haven't been able to choose either.
ReplyDeleteI'm thinking of putting all your names in a hat and drawing one out... I'm that desperate!
I really don't know which way to vote.
I really don't think I can choose. These are all so amazing. I am in awe.
ReplyDeleteThis is a hard one, I am having a hard time choosing between the new wall and the fence.
ReplyDeleteWhat i love most is the cavity caps. I like what you did to them. It's really beautiful! I always amazed with your ideas.
ReplyDeleteJane Taylor
vertical blinds in liverpool quick tips on selecting the right shape and styling your room